Preparing the Pond for Lining: Key Steps in Pond Construction
Ponds are valuable resources that serve various purposes, such as irrigation, aquaculture, and recreational activities. Constructing a pond requires meticulous planning and execution to ensure its longevity and functionality. One key aspect of pond construction is preparing the pond for lining, which involves several essential steps. For instance, let’s consider a hypothetical case study where a farmer wants to construct a new fishpond on his property. Before proceeding with the actual lining process, it is crucial for him to understand the necessary steps involved in preparing the pond adequately.
The first step in preparing the pond for lining is site selection and preparation. This entails selecting an appropriate location based on factors like topography, soil composition, availability of water sources, and accessibility. The chosen area should be free from any potential contamination or interference from nearby structures or vegetation that may affect the quality of the pond water. Once an ideal location has been identified, thorough land clearing must take place to remove trees, stumps, rocks, and other debris that could hinder proper excavation and compaction processes.
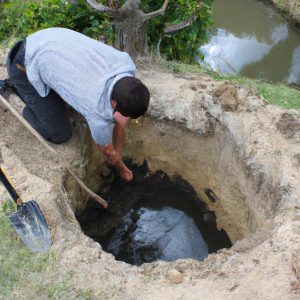
Following site selection and preparation comes the critical step of excavating the pond basin. Excavation involves removing soil from the designated area to create space for holding water. The depth and shape of the basin depend on the intended use and size of the pond. In the case of a fishpond, it is essential to consider factors such as water depth requirements for fish species and the desired volume of water. The basin should be excavated with gentle slopes to ensure proper water circulation and ease of maintenance.
After excavation, the next step is soil compaction. This process involves compacting the soil in the pond basin to create a stable foundation for the lining material. Compaction can be done using heavy machinery or manual methods like rolling or tamping, depending on the size of the pond and available resources. Proper compaction helps prevent future settling or shifting of the pond structure.
Once compaction is complete, it is necessary to address any potential seepage issues by conducting a soil percolation test. This test measures how quickly water infiltrates into the soil and helps determine if additional measures are needed to minimize seepage losses from the pond. If excessive seepage is detected, options like adding a layer of compacted clay or installing a synthetic liner may be considered.
Before proceeding with actual lining installation, it is crucial to install an underlayment layer if required. Underlayment materials like geotextile fabric provide an extra barrier between the soil and lining material, protecting against punctures or damage that could compromise its integrity.
Finally, after completing all necessary preparations, it is time to install the chosen lining material. Common options include clay liners, which involve spreading and compacting layers of clay over the entire pond basin until an impermeable seal is achieved; synthetic liners like PVC or EPDM rubber membranes, which are laid out over the prepared surface; or concrete linings for more permanent structures.
In conclusion, preparing a pond for lining involves several important steps: site selection and preparation, excavation of the basin, soil compaction, addressing seepage issues if necessary through testing and additional measures such as clay layers or synthetic liners, installation of underlayment if required, and finally, the installation of the chosen lining material. Following these steps diligently will help ensure a well-constructed pond that can serve its intended purposes effectively.
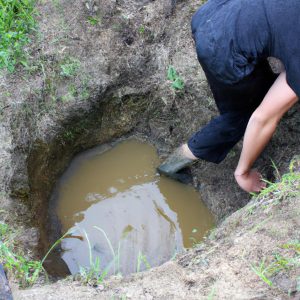
Step 1: Clearing the Pond Area
Step 1: Clearing the Pond Area
To ensure a successful pond construction project, it is essential to begin with proper preparation of the pond area. This initial step involves clearing the land and removing any obstacles that may hinder the subsequent stages of pond lining.
Firstly, let’s consider an example scenario where a group of farmers in rural America decide to build a new pond on their property. The chosen site is overgrown with bushes and trees, making it necessary to clear the area before starting the actual construction process. By doing so, they create a blank canvas ready for excavation and lining.
Clearing the pond area typically entails several key tasks:
-
Removal of vegetation: Vegetation such as grass, shrubs, and small trees must be cleared from the designated site. This can be achieved through mowing, cutting down larger plants, or using herbicides if needed.
-
Debris removal: Any debris present within the proposed pond area should be removed completely. This includes rocks, branches, trash, and other materials that might interfere with later stages of construction.
-
Leveling the ground: Ensuring a level base is crucial for proper water retention in the finished pond. Excavators or bulldozers are commonly employed to remove high spots and fill low areas to achieve an even surface.
-
Addressing drainage issues: It is important to assess drainage patterns around the site to prevent potential problems in the future. If there are natural slopes directing water towards the planned location of the pond, appropriate measures need to be taken to divert excess runoff away from it.
By following these steps in clearing the pond area diligently, one can lay a solid foundation for constructing a well-functioning lined pond capable of meeting various needs – whether it be irrigation purposes or creating a habitat for aquatic life.
Moving forward with our discussion about preparing ponds for lining, we will now explore Step 2: Excavating the Pond. This process involves shaping and digging the pond’s structure, setting the stage for subsequent stages of construction.
[Transition sentence into “Step 2: Excavating the Pond”: Now that we have a clear area to work with, let’s delve into the next crucial step – excavating the pond.]
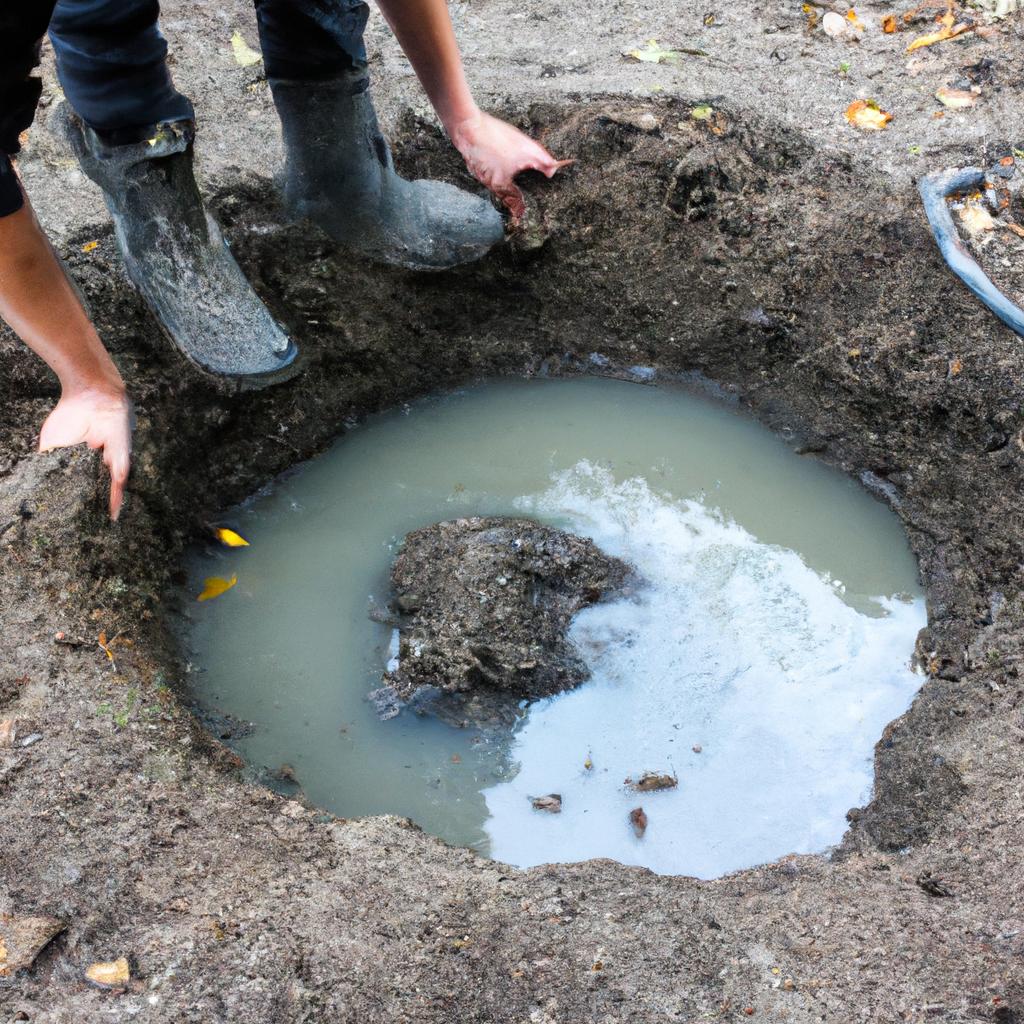
Step 2: Excavating the Pond
Previous section H2 Transition: With the pond area cleared, let’s move on to the next crucial step in constructing a pond.
Excavation is a critical phase in building a pond as it sets the foundation for proper water containment and ensures long-term stability. To illustrate its importance, let’s consider an example where a farmer, John, decides to build a new fishpond on his property.
To begin with, after clearing the designated area, John hired a professional excavation team equipped with heavy machinery suitable for digging ponds. The team carefully marked out the desired shape and dimensions of the pond before starting their work. This initial planning stage ensured that there was enough space to accommodate John’s intended use of the pond while adhering to local regulations regarding setbacks from property boundaries or natural features.
Once excavation commenced, several key steps were followed:
-
Depth Considerations:
- Determining optimal depth based on intended use (e.g., recreational fishing or aquaculture).
- Ensuring sufficient depth for adequate water volume and temperature regulation.
- Factoring in regional climate conditions and potential evaporation rates.
-
Sloping Techniques:
- Incorporating gradual slopes along different sections of the pond perimeter.
- Preventing erosion by establishing gentle inclines rather than steep drop-offs.
- Promoting easy access for maintenance purposes.
-
Dealing with Soil Conditions:
- Assessing soil composition to identify any potential issues such as high clay content or excessive rocks.
- Removing unsuitable soils and replacing them with more appropriate materials if necessary (e.g., adding sandy loam).
-
Addressing Drainage Needs:
- Designing effective drainage systems within or around the pond to handle excess rainwater runoff.
- Implementing measures like installing pipes or culverts to prevent pond overflow during heavy rainfall.
By carefully following these steps, John’s excavation team ensured a solid foundation for his fishpond. The attention given to depth considerations, sloping techniques, soil conditions, and drainage needs contributes significantly to the overall success of the pond construction project.
With the excavation completed, we can now move on to Step 3: Compacting the Pond Base.
Step 3: Compacting the Pond Base
Preparing the Pond for Lining: Key Steps in Pond Construction
In the previous step, we discussed how to excavate the pond. Now, let’s move on to the next crucial phase in constructing a pond – preparing it for lining. To illustrate this process, let’s consider an example of a farmer who wants to build a fishpond on their property.
Once the excavation is complete, the first step in preparing the pond for lining involves removing any loose soil or debris from the area. This can be done by raking or sweeping the base of the pond and disposing of any unwanted material properly. By ensuring a clean surface, potential punctures or imperfections that may compromise the integrity of the liner can be minimized.
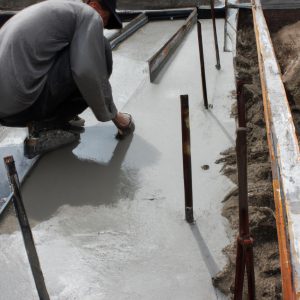
Next, compacting the pond base becomes essential to create a stable foundation for the subsequent steps. Compaction helps eliminate air gaps and ensures uniformity in soil density throughout the pond bottom. The use of heavy machinery such as rollers or compactors aids in achieving adequate compaction while also providing efficiency during large-scale projects.
To further enhance stability and minimize seepage issues, adding an underlayment layer before installing the liner proves beneficial. An underlayment acts as an additional protective barrier between the ground and liner material, reducing friction and preventing sharp objects from piercing through. Commonly used materials include geotextile fabrics or synthetic liners specifically designed for this purpose.
To better visualize these key steps involved in preparing a pond for lining, here are some bullet points:
-
Clear out any loose soil or debris from within
- Rake or sweep away unwanted materials
- Proper disposal of removed debris
-
Compact the pond base thoroughly
- Use heavy machinery like rollers or compactors
- Achieve uniform soil density across entire bottom
-
Add an underlayment layer
- Enhance stability and reduce friction
- Protect against puncture risks
Additionally, referring to the table below can provide a comprehensive overview of these steps:
| Steps | Description |
|---|---|
| Remove debris | Rake or sweep away loose soil and unwanted materials |
| Compact pond base | Use heavy machinery to achieve uniform soil density |
| Add underlayment layer | Enhance stability and protect against puncture risks |
By following these essential steps, our farmer will be well-prepared for the next phase: installing the drainage system. This ensures efficient water management in the fishpond, maintaining optimal conditions for aquatic life while minimizing potential risks.
Step 4: Installing Drainage System
After ensuring a solid foundation by compacting the pond base, the next crucial step in pond construction is installing an effective drainage system. By implementing proper drainage measures, water can be efficiently managed and controlled within the pond, preventing potential issues such as overflow or stagnant water.
To illustrate the importance of a well-designed drainage system, let’s consider a hypothetical scenario of constructing a fish farm pond. In this case, maintaining optimal water levels and controlling excess runoff are critical to ensure healthy fish growth and minimize environmental impacts.
A properly installed drainage system offers several benefits that contribute to efficient pond management:
- Effective Water Control: A well-designed drainage system allows for better control over water levels within the pond. This ensures optimal conditions for aquatic life while mitigating risks associated with excessive flooding or low water volume.
- Prevents Erosion: Properly designed drains help prevent erosion caused by excessive surface runoff during heavy rainfall events. This protects both the integrity of the pond structure and surrounding areas from soil loss.
- Minimizes Nutrient Accumulation: An adequately functioning drainage system helps reduce nutrient buildup within ponds. By facilitating regular water exchange, it prevents stagnation and minimizes algae blooms.
- Facilitates Easy Maintenance: The installation of strategically placed drain outlets makes routine maintenance tasks such as sediment removal more convenient. This contributes to overall ease of management and enhances long-term sustainability.
The table below highlights key components typically found in a well-designed drainage system:
| Component | Description |
|---|---|
| Outlet Pipe | Allows controlled release of excess water from the pond |
| Gravel Filter Bed | Filters out debris before discharge |
| Overflow Pipe | Prevents pond overflow during heavy rainfall events |
| Inlet Pipe | Collects water from external sources, such as rainwater harvesting systems |
In conclusion, the installation of an effective drainage system is a crucial step in preparing a pond for lining. By implementing proper measures to manage water levels and control runoff, potential issues related to flooding, erosion, nutrient accumulation, and maintenance can be mitigated. With this foundation established, we can now move on to Step 5: Adding a Protective Layer.
Transition into subsequent section:
With the drainage system securely in place, attention can now shift toward adding a protective layer to enhance the durability of the pond structure.
Step 5: Adding Protective Layer
After installing the drainage system, the next crucial step in pond construction is adding a protective layer to ensure the longevity and integrity of the lining. Let’s explore this process further.
Protecting the pond lining is essential to prevent any damage that may occur from external factors such as sharp objects or roots. One example illustrating the significance of this step involves a case study on a commercial fish farm located in a rural area. The owners decided to construct an earthen pond for their fish stock, but neglected to add a protective layer. Unfortunately, due to frequent rainfall and nearby vegetation, the exposed liner was punctured by branches and debris, resulting in significant financial losses for the business.
To avoid similar setbacks, here are some key steps involved in adding a protective layer during pond construction:
- Selecting the appropriate material: Choose a suitable protective material based on factors such as cost-effectiveness, durability, and compatibility with the chosen liner material.
- Preparing the base: Ensure proper compaction and smoothing of the soil surface before laying down the protective layer. This will help provide stability and minimize potential unevenness that could lead to tears or leaks.
- Installing geotextile fabric: Geotextile fabric acts as an additional barrier between the underlying soil and primary liner. It helps distribute stress evenly across the surface while preventing any direct contact between sharp objects or roots and jeopardizing its integrity.
- Securing edges: Properly anchor and secure all edges of both geotextile fabric and main pond liner using stakes or other reliable methods. This ensures they remain firmly in place during filling and use.
In addition to these steps, it can be helpful to understand how various materials perform when used as protective layers for pond liners. Consider Table 1 below which provides an overview comparing different commonly used options:
| Material | Advantages | Disadvantages |
|---|---|---|
| Sand | – Good protection against punctures | – May shift over time, requiring maintenance |
| Concrete | – Strong and durable | – Expensive; requires professional installation |
| Rubber Membrane | – Excellent resistance to damage | – Higher cost compared to other materials |
| Geomembrane | – Versatile; available in various thicknesses | – Requires careful handling during installation |
Table 1: A comparison of different protective layer options for pond liners.
In conclusion, adding a protective layer is an essential step in pond construction. By carefully selecting the appropriate material, properly preparing the base, installing geotextile fabric, and securing all edges, you can significantly enhance the longevity and performance of your pond lining. Once this crucial task is complete, we can move on to Step 6: Filling the Pond with Water seamlessly.
Step 6: Filling the Pond with Water
Transitioning smoothly from the previous section, we move on to Step 6 in pond construction, which involves filling the pond with water. This step is crucial as it completes the initial stages of constructing a pond and sets the foundation for its future purpose and functionality.
To illustrate this process, let’s consider an example scenario where a farmer named John plans to construct a fishpond on his property. Having completed steps one through five successfully, including excavation, soil compaction, shaping the pond bed, adding drainage pipes, and applying a protective layer, John now moves forward with filling the pond.
Filling the pond with water entails several key considerations:
-
Source of Water:
- Determine whether to use surface or groundwater sources.
- Assess accessibility and availability of water supply.
- Consider any legal restrictions or permits required for extraction.
-
Quantity of Water:
- Calculate the volume of water needed based on desired depth and surface area.
- Ensure sufficient water supply throughout various seasons.
-
Control Measures:
- Install overflow structures to prevent accidental flooding during heavy rainfall.
- Incorporate inlet valves or diversion channels for effective water management.
- Implement monitoring systems to regulate water levels and identify potential leaks.
-
Initial Treatment:
- Depending on water quality parameters such as pH level and turbidity, apply appropriate treatment measures like filtration or chemical adjustment if necessary.
By following these guidelines and considering factors unique to their specific circumstances, individuals undertaking pond construction can ensure that they achieve optimal results in terms of both structural integrity and operational efficiency. Constructing ponds requires careful planning while keeping environmental sustainability in mind.
In summary, filling a newly constructed pond with water marks a significant milestone in the overall process. It is essential to source water appropriately, calculate its quantity accurately, implement control measures for effective management, and address any initial treatment needs. By adhering to these steps, individuals can progress towards creating a functional pond that aligns with their intended purpose.
Please note that the subsequent section will explore additional critical steps in building a lined pond; therefore, this discussion on filling the pond concludes our current topic.